初始化配置
说明:我使用的MCU是stm32f103c8t6。
1. 在Arch Linux下配置开发环境
sudo pacman -S openocd stlink
安装完后,将板子、stLink下载器和电脑连接起来,注意:针脚一定要对应,否则会有烧坏风险。
验证:
st-info --probe
如果线没有插牢固:
$ openocd -f interface/stlink.cfg -f target/stm32f1x.cfg
Open On-Chip Debugger 0.12.0-01004-g9ea7f3d64-dirty (2025-11-12-08:18)
Licensed under GNU GPL v2
For bug reports, read
       http://openocd.org/doc/doxygen/bugs.html
Info : auto-selecting first available session transport "hla_swd". To override use 'transport select <transport>'.
Info : The selected transport took over low-level target control. The results might differ compared to plain JTAG/SWD
Info : Listening on port 6666 for tcl connections
Info : Listening on port 4444 for telnet connections
Info : clock speed 1000 kHz
Info : STLINK V2J37S7 (API v2) VID:PID 0483:3748
Info : Target voltage: 3.244890
Error: init mode failed (unable to connect to the target)
正常输出:
$ openocd -f interface/stlink.cfg -f target/stm32f1x.cfg
Open On-Chip Debugger 0.12.0-01004-g9ea7f3d64-dirty (2025-11-12-08:18)
Licensed under GNU GPL v2
For bug reports, read
       http://openocd.org/doc/doxygen/bugs.html
Info : auto-selecting first available session transport "hla_swd". To override use 'transport select <transport>'.
Info : The selected transport took over low-level target control. The results might differ compared to plain JTAG/SWD
Info : Listening on port 6666 for tcl connections
Info : Listening on port 4444 for telnet connections
Info : clock speed 1000 kHz
Info : STLINK V2J37S7 (API v2) VID:PID 0483:3748
Info : Target voltage: 3.263551
Info : [stm32f1x.cpu] Cortex-M3 r1p1 processor detected
Info : [stm32f1x.cpu] target has 6 breakpoints, 4 watchpoints
Info : starting gdb server for stm32f1x.cpu on 3333
Info : Listening on port 3333 for gdb connections
2.使用stm32cubemx创建工程
可以便捷地使用yay安装。
yay -S stm32cubemx
打开无响应,发现报错?
# 可供参考的命令
sudo pacman -S archlinux-java-run
archlinux-java status
sudo archlinux-java set [填入你上一条命令得到的jdk名称]
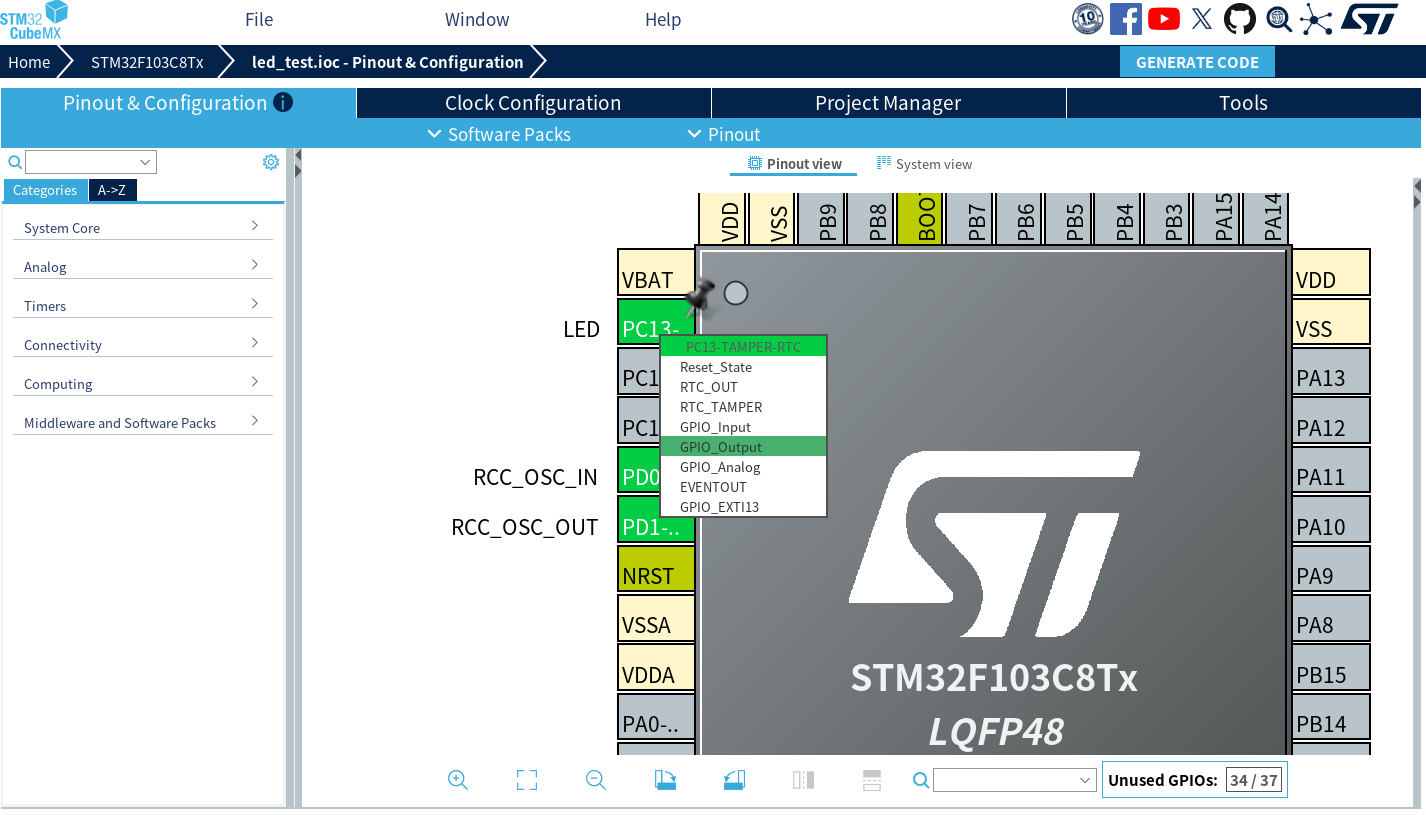
找到MCU型号创建工程后,按图示设置引脚:
:
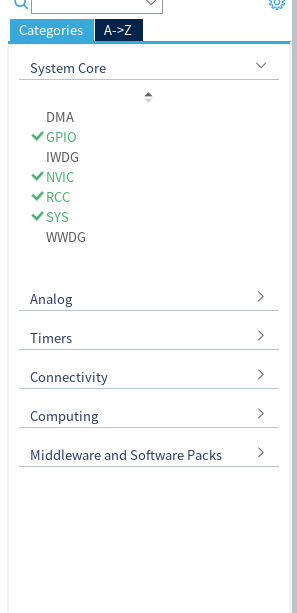
在左侧边栏的System Core这里将如图所示的选项勾选:
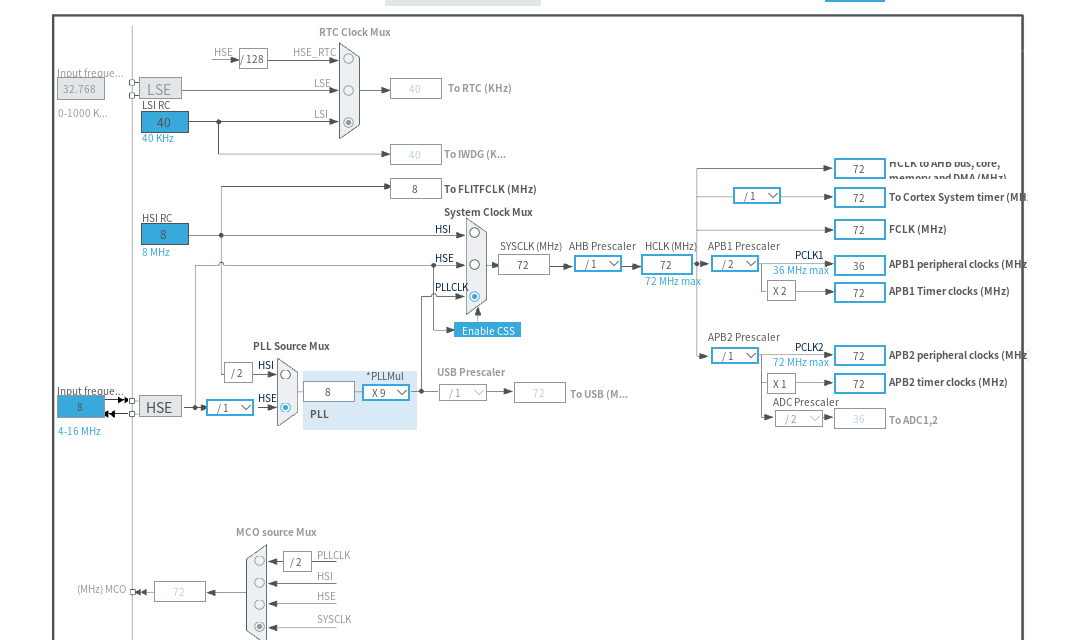
像图中那样配置时钟: